
In this video I’m continuing to restore my Amiga 600. I have two objectives: 1, repair the floppy drive, and 2, retrobright the case.
The floppy drive is the important thing, because without it the machine won’t even start. It’s like a car without a fuel tank. Now, the problem as I discovered it last time is that the drive ticks when the computer is powered up, but nothing happens when you put a disk into the drive.
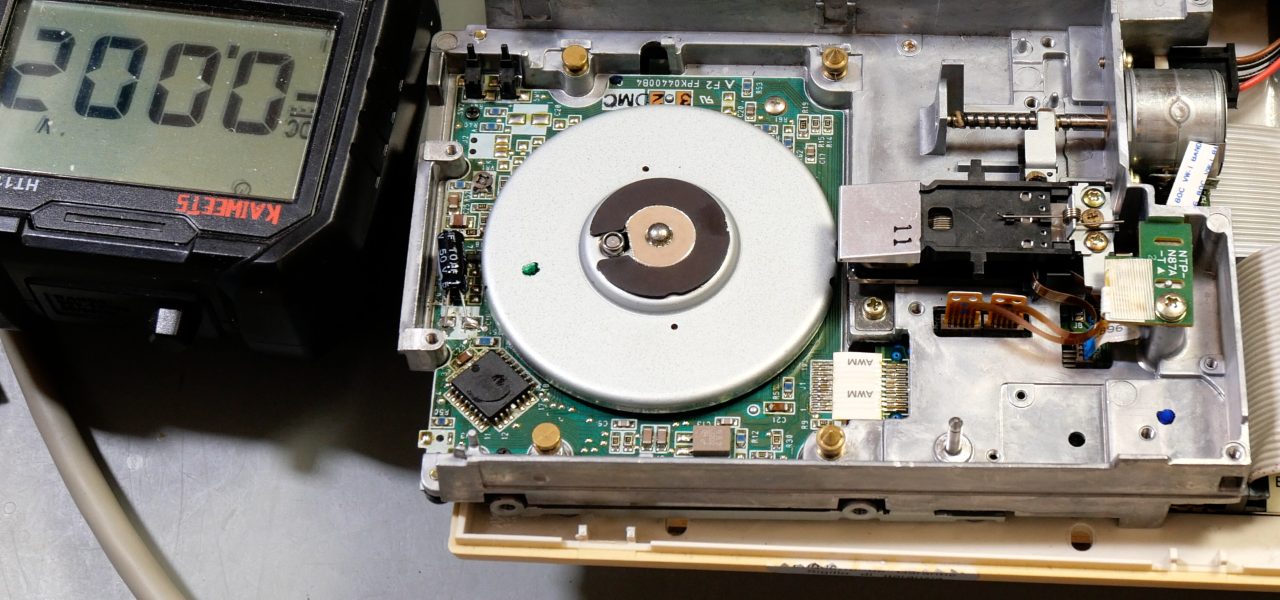
After some investigation, I discover that the spindle isn’t turning. Now, there are two PCBs in the drive; one controls the stepper motor and heads (this would appear to be fine), the other controls the spindle motor. If you remember my SFD 1001 posts, the spindle motor board was prone to having leaky capacitors, and this would appear to be the case here too. There’s only one electrolytic and it’s a surface mount one. Since I don’t have any stock, I’ll need to replace it with a small axial. No biggie.
Retrobrighting
The case is pretty clean, but it has yellowed, particularly at the back. So I’m going to redrobright it. Since it’s the middle of winter, I’ll need to use Peroxide indoors. The usual precautions apply. I’ve found a smaller container – it’s a drawer from one of my storage units, but it’s just the right size for my A600 case. Which also means it’ll need less liquid. The drawer will go into my foil lined cardboard box, which has a hole cut in the top for the grow light. This time I’m trying a couple of new things: I have added an aquarium heater to keep the peroxide at a reasonably warm 33°C (it works best up at around 70°C, but that would not be good for the plastic!). It’s -10°C outside this week, so the warmth is going to help. Also I’ve added a strip of UV LEDs around the sides of the box. They’re not particularly bright, but I’m hoping they’ll help give a more even spread.
I want to thank my favourite PCB maker https://www.pcbway.com for sponsoring this video. Be sure to check them out for your PCB needs.